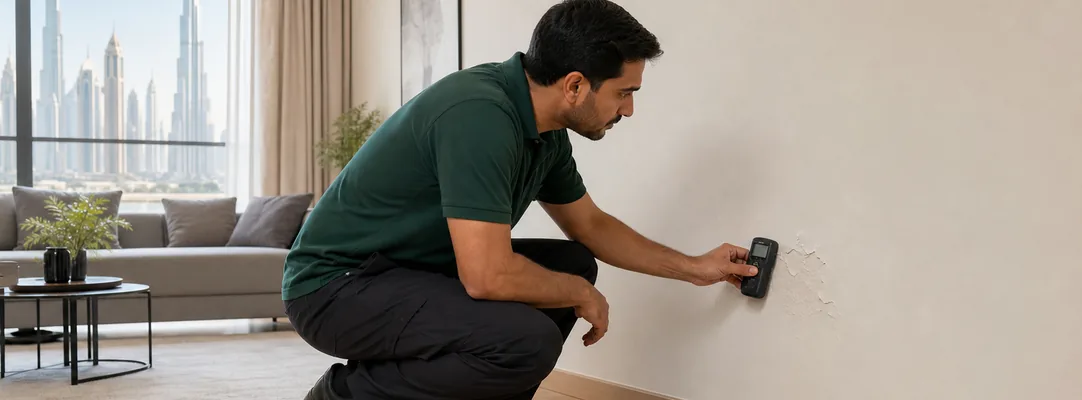
Peeling, bubbling or flaking paint can make an otherwise well-maintained Dubai apartment or villa look neglected. However, applying another coat immediately may only hide the symptom for a short time. The wall condition, location of the damage and possible source should be reviewed before the repainting scope is confirmed.
Paint can lose adhesion because of age, unsuitable earlier preparation, incompatible coatings, repeated contact or moisture reaching the surface. Similar-looking damage can have different causes, so appearance alone should not be treated as a diagnosis.
Identify the type and location of the damage
Begin with observations that do not require scraping, drilling or opening the wall. Look at the affected surface in daylight and note whether the paint is:
- Lifting in thin flakes
- Forming raised bubbles or blisters
- Cracking into a visible pattern
- Turning powdery when already loose
- Separating around a repaired patch
- Discoloured before it begins to peel
- Damaged along a ceiling edge, corner or skirting
- Affected beside a window, pipe route or bathroom wall
- Limited to one small contact area
- Reappearing after an earlier repaint
Record whether the affected area looks visibly wet or darker than the surrounding wall, but do not press, puncture or peel a bubble to investigate it. A photo cannot confirm what is happening behind the coating, although the pattern can help a painter, plumber or building team decide what should be assessed next.
For damage found during a wider property review, use the Dubai home maintenance checklist to record related signs in nearby rooms.
Do not assume every peeling wall has the same cause
Dry, localised flaking may be associated with an older coating, poor adhesion, an earlier patch or normal impact around frequently used areas. Bubbling, staining or repeated peeling may also appear when moisture reaches the surface.
Possible moisture can come from several locations, including an internal plumbing connection, the apartment above, a shared service route, condensation or water entering around an external part of the building. These are possibilities rather than conclusions. A painter should not be expected to identify a concealed water source from the paint condition alone.
Also check whether the marks change after:
- Use of a nearby sink, shower or washing machine
- Rain or exterior cleaning
- Air-conditioning operation
- Work in an adjoining room or apartment
- A period when the property was closed
- An earlier plumbing or painting repair
This timeline is useful evidence, but occupants should not recreate a leak or repeatedly run water to test a theory.
Know when painting should wait
Repainting should normally wait when the surface is actively wet, the discolouration is spreading or the underlying concern has not been reviewed. Fresh paint applied over an unresolved issue may blister, stain or separate again.
Contact the appropriate building, emergency or specialist support promptly if there is:
- Water actively entering through a wall or ceiling
- A ceiling area that is visibly sagging or bulging
- Falling plaster or another unstable surface
- Water close to a socket, switch, light or powered equipment
- Rapidly spreading damage that may affect another property
- Wastewater or unknown contaminated material
- An immediate danger to occupants or the building
Do not touch wet electrical fittings, stand beneath a visibly unstable ceiling or open a service panel. Move away from the area and prevent children and pets from approaching it. A routine painting request should not delay an urgent building or safety response.
If there is extensive unknown surface growth, a strong unusual odour or damaged material of uncertain type, avoid scraping, sanding or disturbing it. Ask the appropriate building or specialist party how the area should be assessed before ordinary preparation begins.
Decide who should review the issue first
The right first contact depends on the visible pattern and property arrangement. Responsibility and access can vary, particularly in apartment buildings, so confirm the relevant procedure instead of assuming who must perform the work.
Consider building management or the property manager
Building coordination may be needed when the damage:
- Appears on a ceiling or shared wall
- Follows rain or seems connected to the exterior
- Is close to a service shaft or common pipe route
- May originate from an apartment above or beside yours
- Has been reported in more than one unit
- Requires access to a common area
- Is subject to contractor permits or approved working hours
These signs do not prove that the source is part of the shared building system. They indicate that access or coordination may be required before the wall can be prepared.
Consider a plumbing assessment
Use Plumbing Services as the relevant starting category when the paint damage appears alongside a leaking tap, pipe, toilet, fixed water connection or wet cabinet area. Report what can be seen without dismantling anything.
Include whether the mark changes after a particular fixture is used and whether another room is affected on the opposite side of the wall. The guide to common plumbing issues in Dubai apartments explains which observations can help describe a possible leak.
A plumbing request should not claim that the pipe is definitely responsible. The affected connection and site condition may need assessment before the cause and repair scope can be confirmed.
Consider a home painting assessment
A Home Painting request is appropriate when the underlying concern has been resolved or when the condition appears to require ordinary surface assessment and preparation. Provide clear photos and mention any previous repair rather than describing the job only as a colour change.
The painter can review the accessible surface and proposed finish, but concealed moisture, structural work, electrical work and specialist treatment should remain within the appropriate scope.
Allow the underlying issue and surface condition to be addressed
A wall that previously became wet may not be ready for immediate painting simply because the visible leak has stopped. The required drying period depends on the material, extent of moisture, ventilation and site conditions. It should be assessed rather than estimated from touch alone.
Before repainting, the agreed process may need to consider:
- Whether the source of damage has been addressed
- Whether the surface is sufficiently dry
- How much loose or failed coating must be removed
- Whether plaster or filler needs repair
- Whether the existing and proposed coatings are compatible
- Whether a suitable primer is required
- Which paint and finish are intended
- Manufacturer preparation, ventilation and drying instructions
- Protection for floors, furniture, fittings and adjacent walls
Do not sand or scrape a damaged area while it is wet or when the coating and underlying material have not been identified. Surface preparation can create dust and loose debris, so the method and protection should form part of the confirmed work.
No coating can guarantee that peeling will never return. The result depends on the underlying condition, preparation, product compatibility, application and later exposure.
Confirm whether a patch or full wall repaint is suitable
A small repaired area may appear different from the rest of the wall even when the colour name is the same. Paint batch, age, finish, previous preparation and exposure to light can all affect the final appearance.
A local touch-up may be considered when the damage is limited and matching paint is available. Repainting the complete wall may create a more consistent result when:
- Several patches require preparation
- The existing colour reference is unknown
- The old coating has changed noticeably
- Damage extends across a broad area
- A previous touch-up remains visible
- The requested finish differs from the existing one
The whole room does not automatically need repainting because one wall is affected. Agree on the included walls, ceiling, trims, doors and repaired areas before work begins.
Do not choose a colour from a phone photo alone. Where possible, provide a labelled leftover container, previous invoice, approved building specification or written confirmation from the landlord or property manager.
Take useful photos before any preparation
Good photographs help explain both the painting work and any issue that may need attention first. Take:
- One wide photo showing the entire wall and room
- A closer photo of the peeling or bubbling area
- A photo showing its position relative to the ceiling, floor, window or fixture
- Images of nearby stains or related damage
- A dated follow-up photo if the area visibly changes
- Photos of any earlier repair that can still be identified
Record when the issue was first noticed, whether it is changing and whether any plumbing, air-conditioning, exterior or renovation work occurred nearby. Do not remove paint simply to make the damage clearer for a photograph.
Check tenancy and move-out requirements
Tenants should review the tenancy agreement and report possible property or building issues through the appropriate channel. Obtain written clarification before authorising work that may affect the landlord's surface, colour specification or inspection record.
If the repainting is connected to a handover, read the Dubai apartment move-out painting checklist. It covers condition photos, approved colours, access planning and the difference between a limited touch-up and a wider repaint.
Painting a damaged wall cannot guarantee handover acceptance or the return of a security deposit. The final decision depends on the applicable agreement, documented condition and relevant inspection.
Prepare a clear home painting request
When the area is safe and ready to be reviewed, include:
- Dubai area, property type and affected room
- Whether the property is occupied, vacant or furnished
- Number of affected walls or ceiling areas
- Wide and close-up photos
- Whether the paint is peeling, bubbling, cracking or staining
- When the issue was first noticed
- Whether the area is dry, changing or recurring
- Any known leak, repair or earlier repaint
- Confirmation received from building management where relevant
- Current and requested colour or finish, if known
- Whether doors, trims, ceilings or other walls are included
- Required building permits, parking and working hours
- Furniture-access and surface-protection requirements
- Preferred appointment date or time window
A requested date remains a preference until confirmed. Surface condition, preparation, paint selection, drying requirements and building access may affect the final scope, schedule and price.
Review the repaired area after completion
After painting, inspect the agreed surfaces under both natural and artificial light. Confirm that the included preparation and painting work has been completed, save the colour and product information, and keep before-and-after photos with any related plumbing or building records.
Follow the paint manufacturer's instructions for ventilation, drying and placing furniture back against the wall. Report any renewed moisture, staining or lifting rather than repeatedly covering it with another touch-up.
The safest order is straightforward: document the paint condition, address any active water or building concern, confirm that the surface is ready, and then agree on the preparation and repainting scope.
Review QuickFix home painting guidance or submit a home painting request.